How to add or edit your menu photos on Wolt
Learn the best practices to add, edit, and update your menu photos for optimal sales impact.
Overview
- Why menu photos matter
- Creating great menu photos: Best practices
- How to add or edit single menu photos from the Merchant Portal
- How to add or edit multiple (large batch) menu photos from the Merchant Portal
- How to change a menu photo
- How to edit a photo
- What is the Merchant Portal?
Learn why images matter at Wolt, our best practices for high-quality photos that can boost your sales, and how to upload them to your venue.
Why menu photos matter
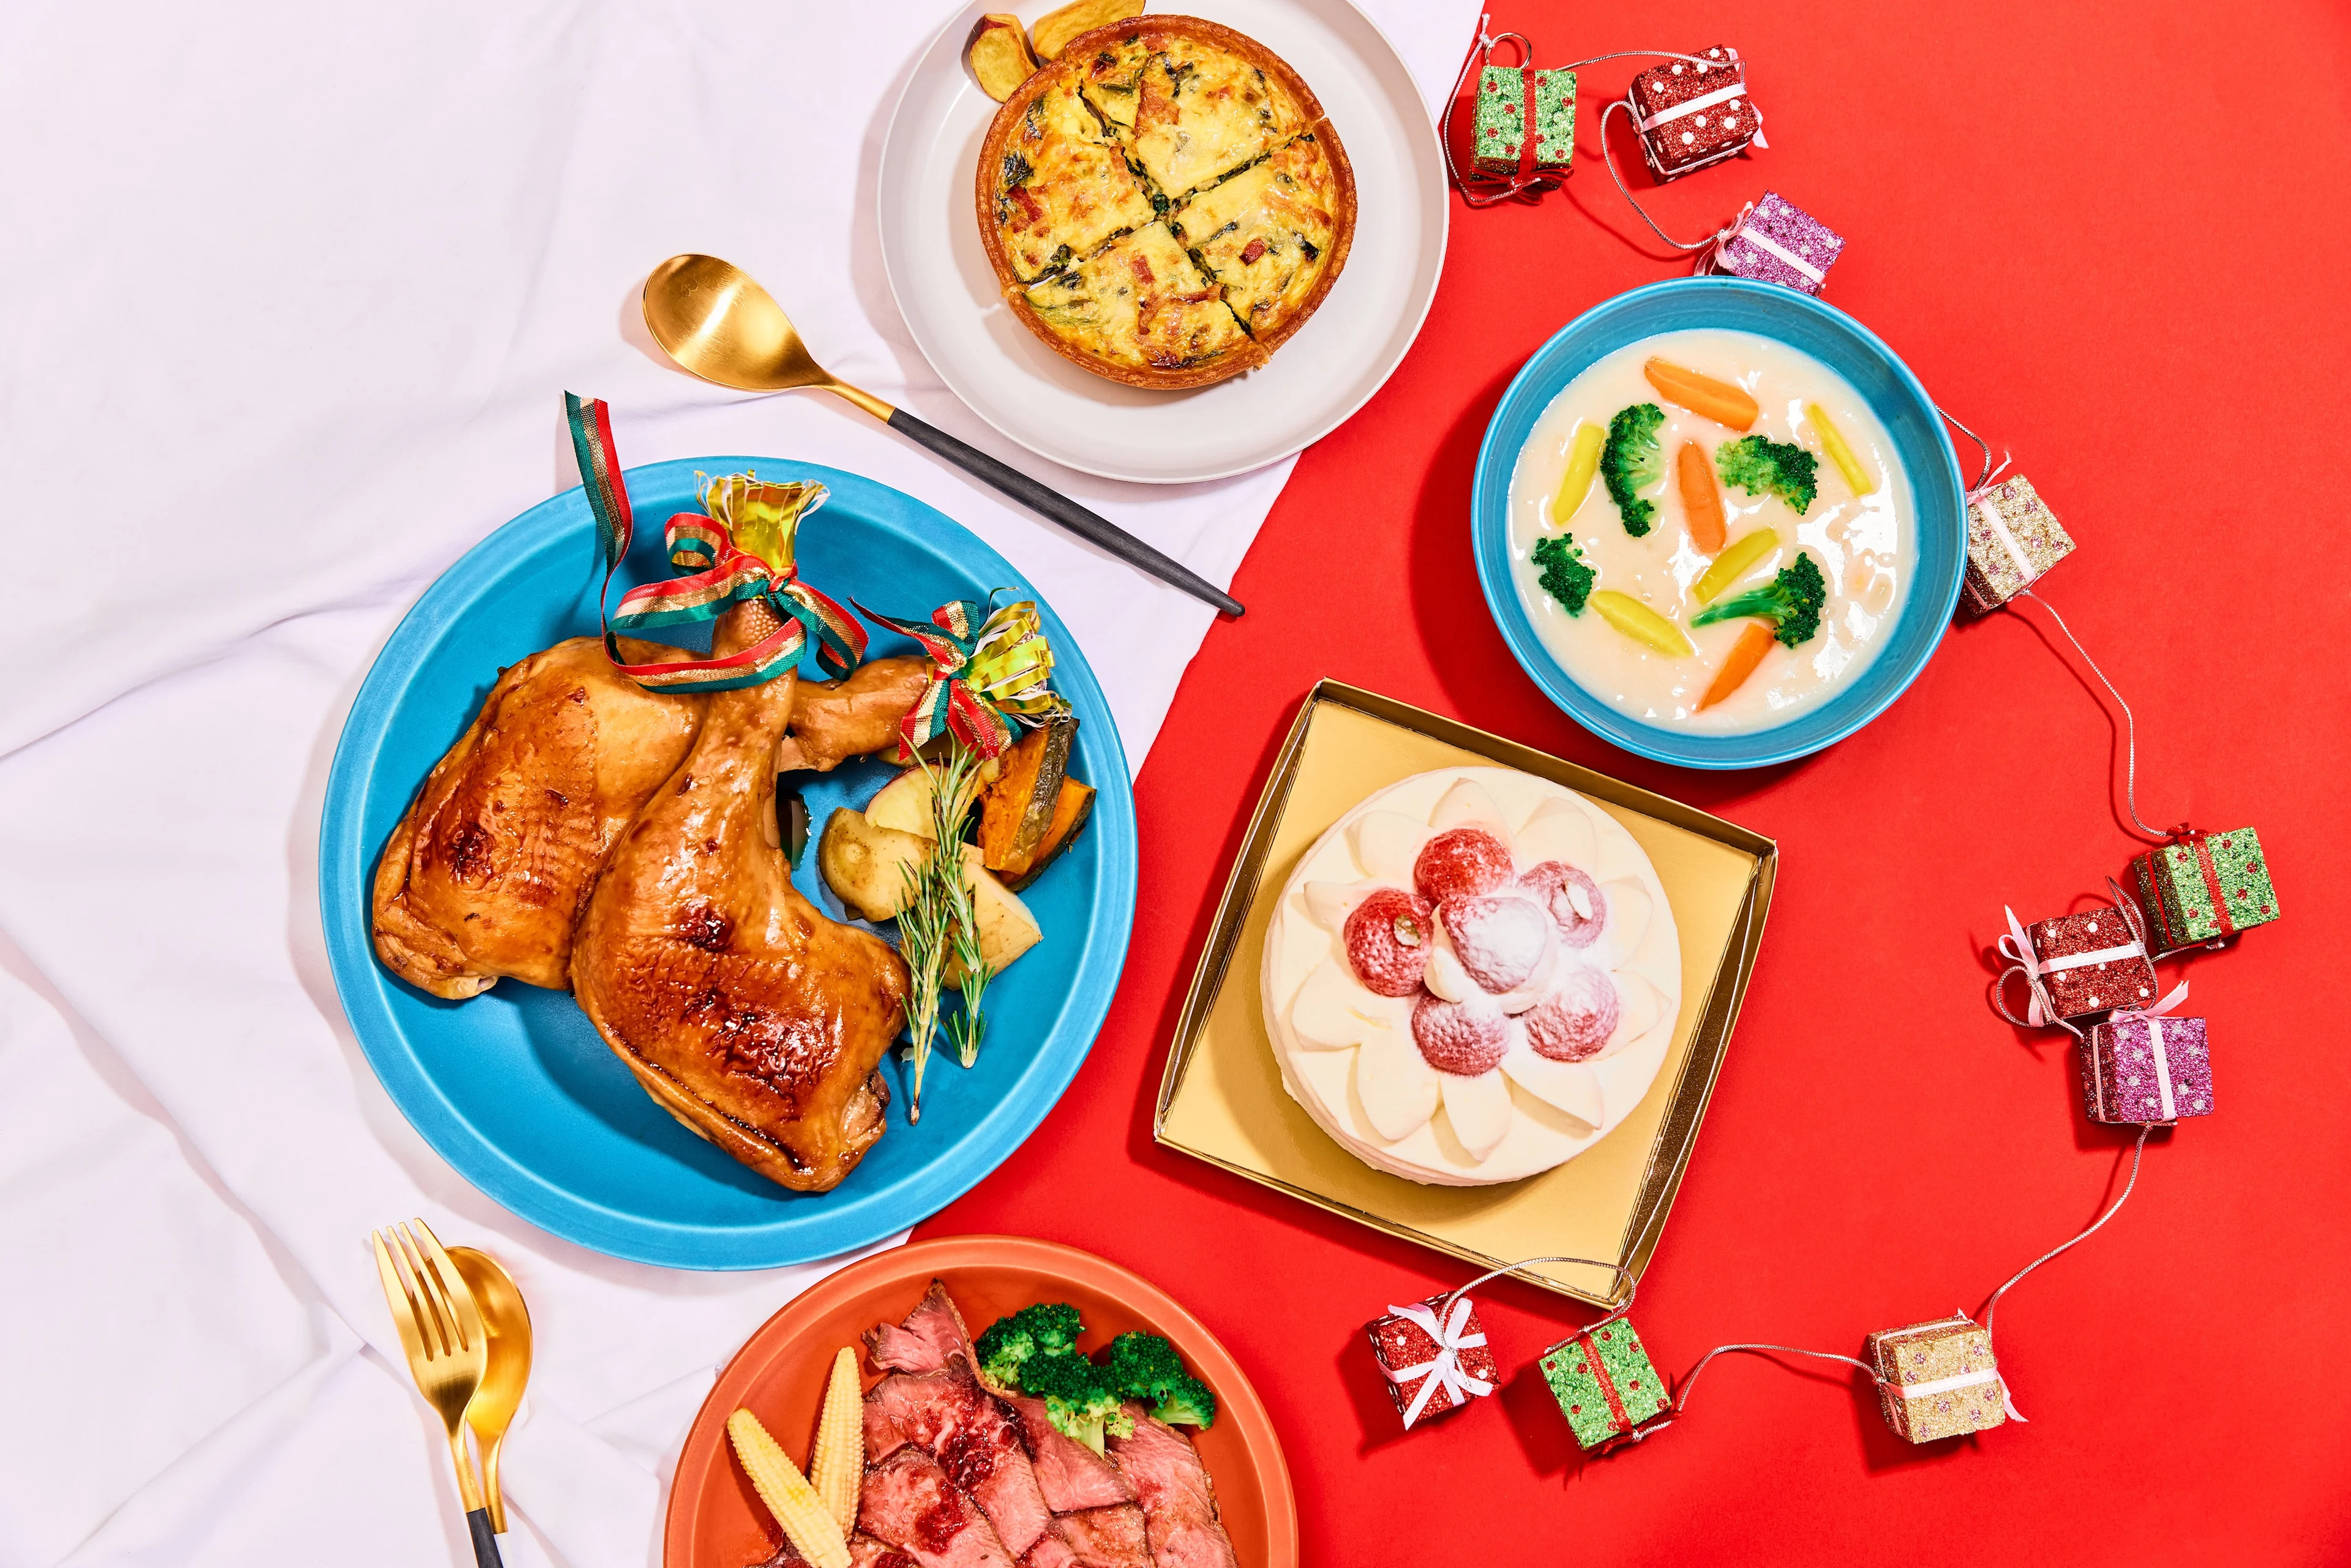
"We eat with our eyes first" is a saying that perfectly explains the importance of food pictures. Here’s why having pictures on your menu is important:
Informed choices: Pictures help customers decide faster and feel more confident about what they’re ordering.
More engagement: Images grab attention—people process visuals up to 10x faster than text.
Higher sales: Great photos don’t just look good—they sell.
💡 Quick tip: Adding high-quality photos of your main dishes can boost your order volume by up to 5x.
Creating great menu photos: Best practices
🚨First things first: Some images will be rejected if they don’t meet Wolt’s photo guidelines. Check out our quick menu photo checklist for best practices.
✅ Menu photo checklist: What to do
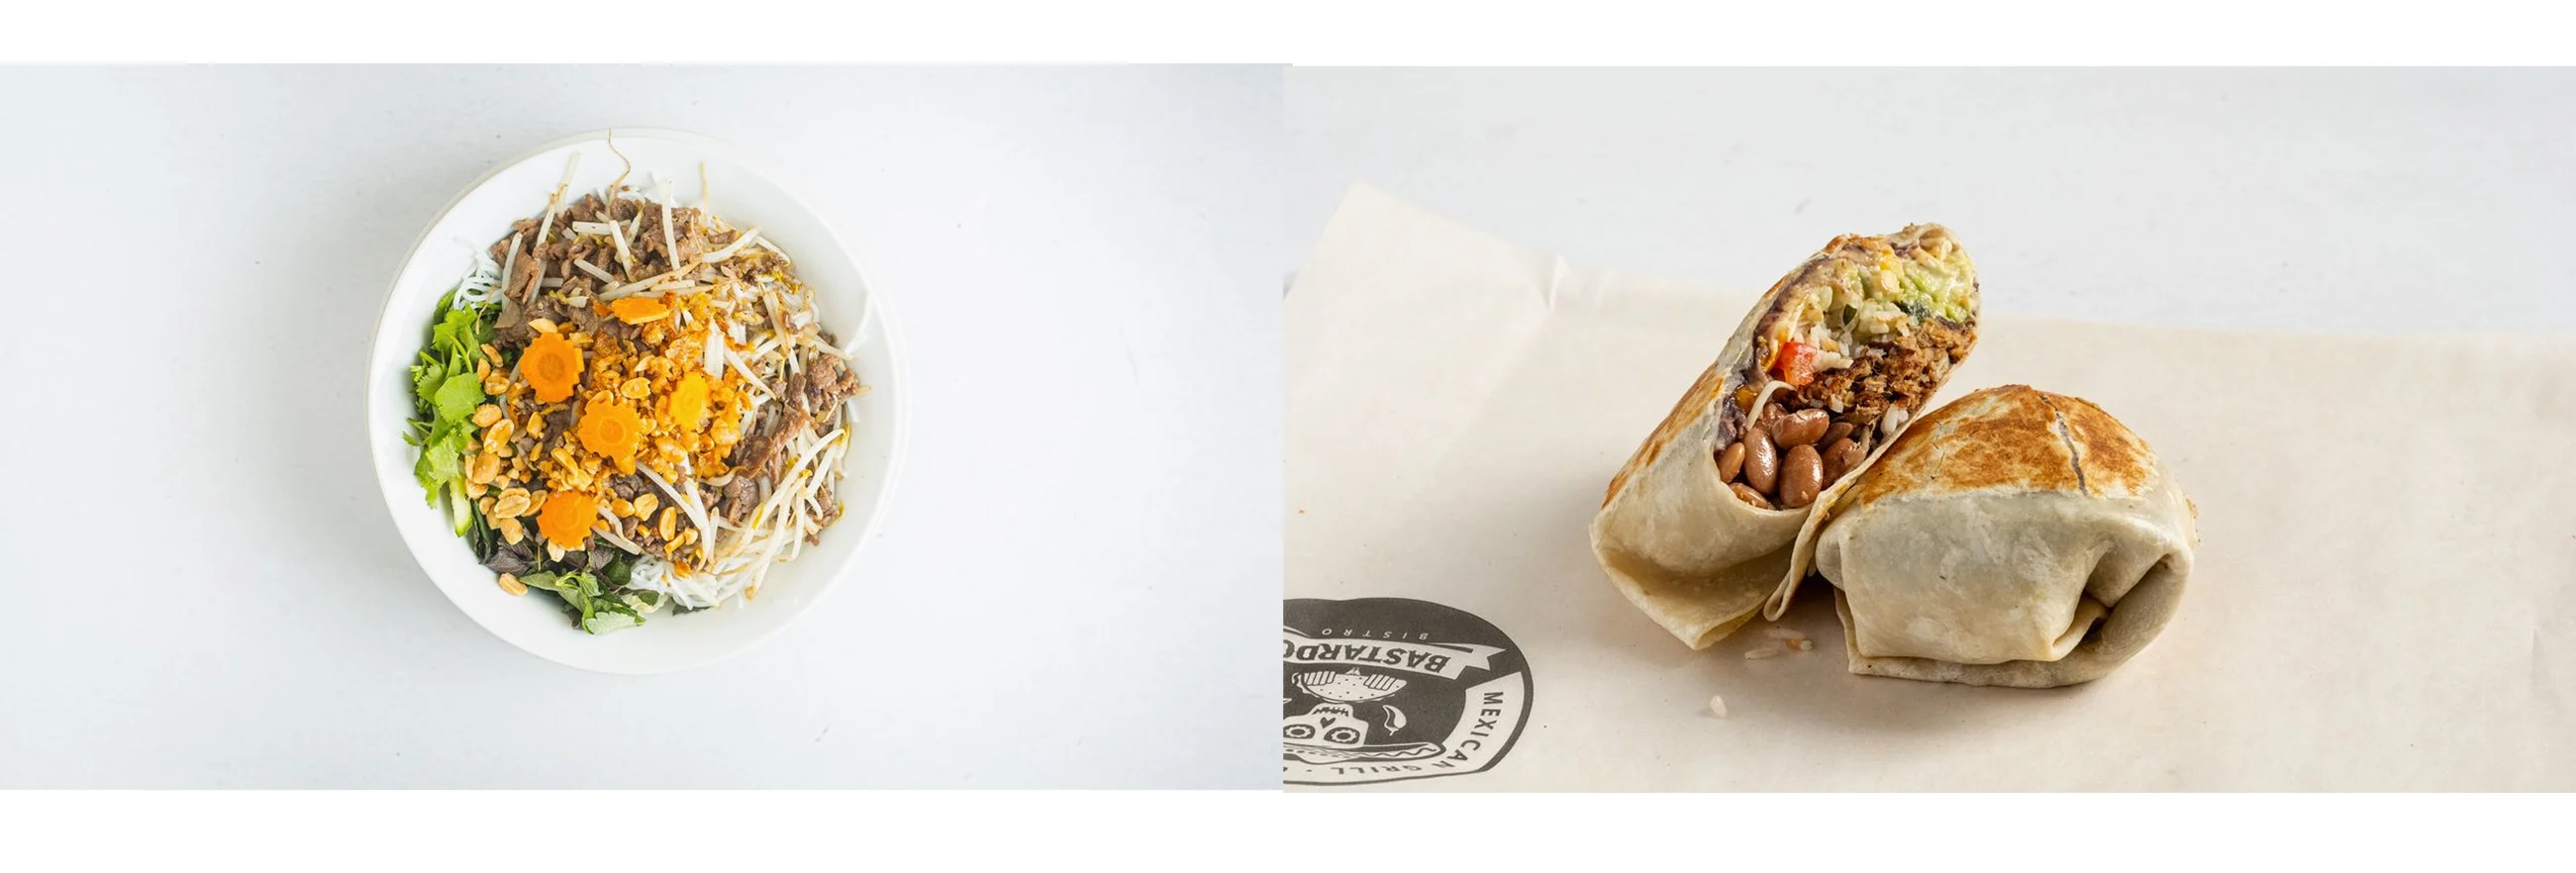
Use horizontal images (16:9 ratio)
Make sure the food is centered in the frame
Show the entire dish — no cropped edges
Use clear, high-quality photos (sharp focus, good lighting)
Focus on the food only — no people in the shot
Keep lighting bright and natural so the food looks appealing
Ensure the photo matches the actual item (realistic portion size, no misleading presentation)
Keep it clean — no extra graphics, text, or borders
❌ What not to do

Don’t use AI-generated images
Don’t submit cropped or partial images
Don’t use vertical photos
Don’t upload blurry or out-of-focus shots
Don’t include people in the image
Don’t show multiple items in one photo (only show the item listed)
How to add or edit single menu photos from the Merchant Portal
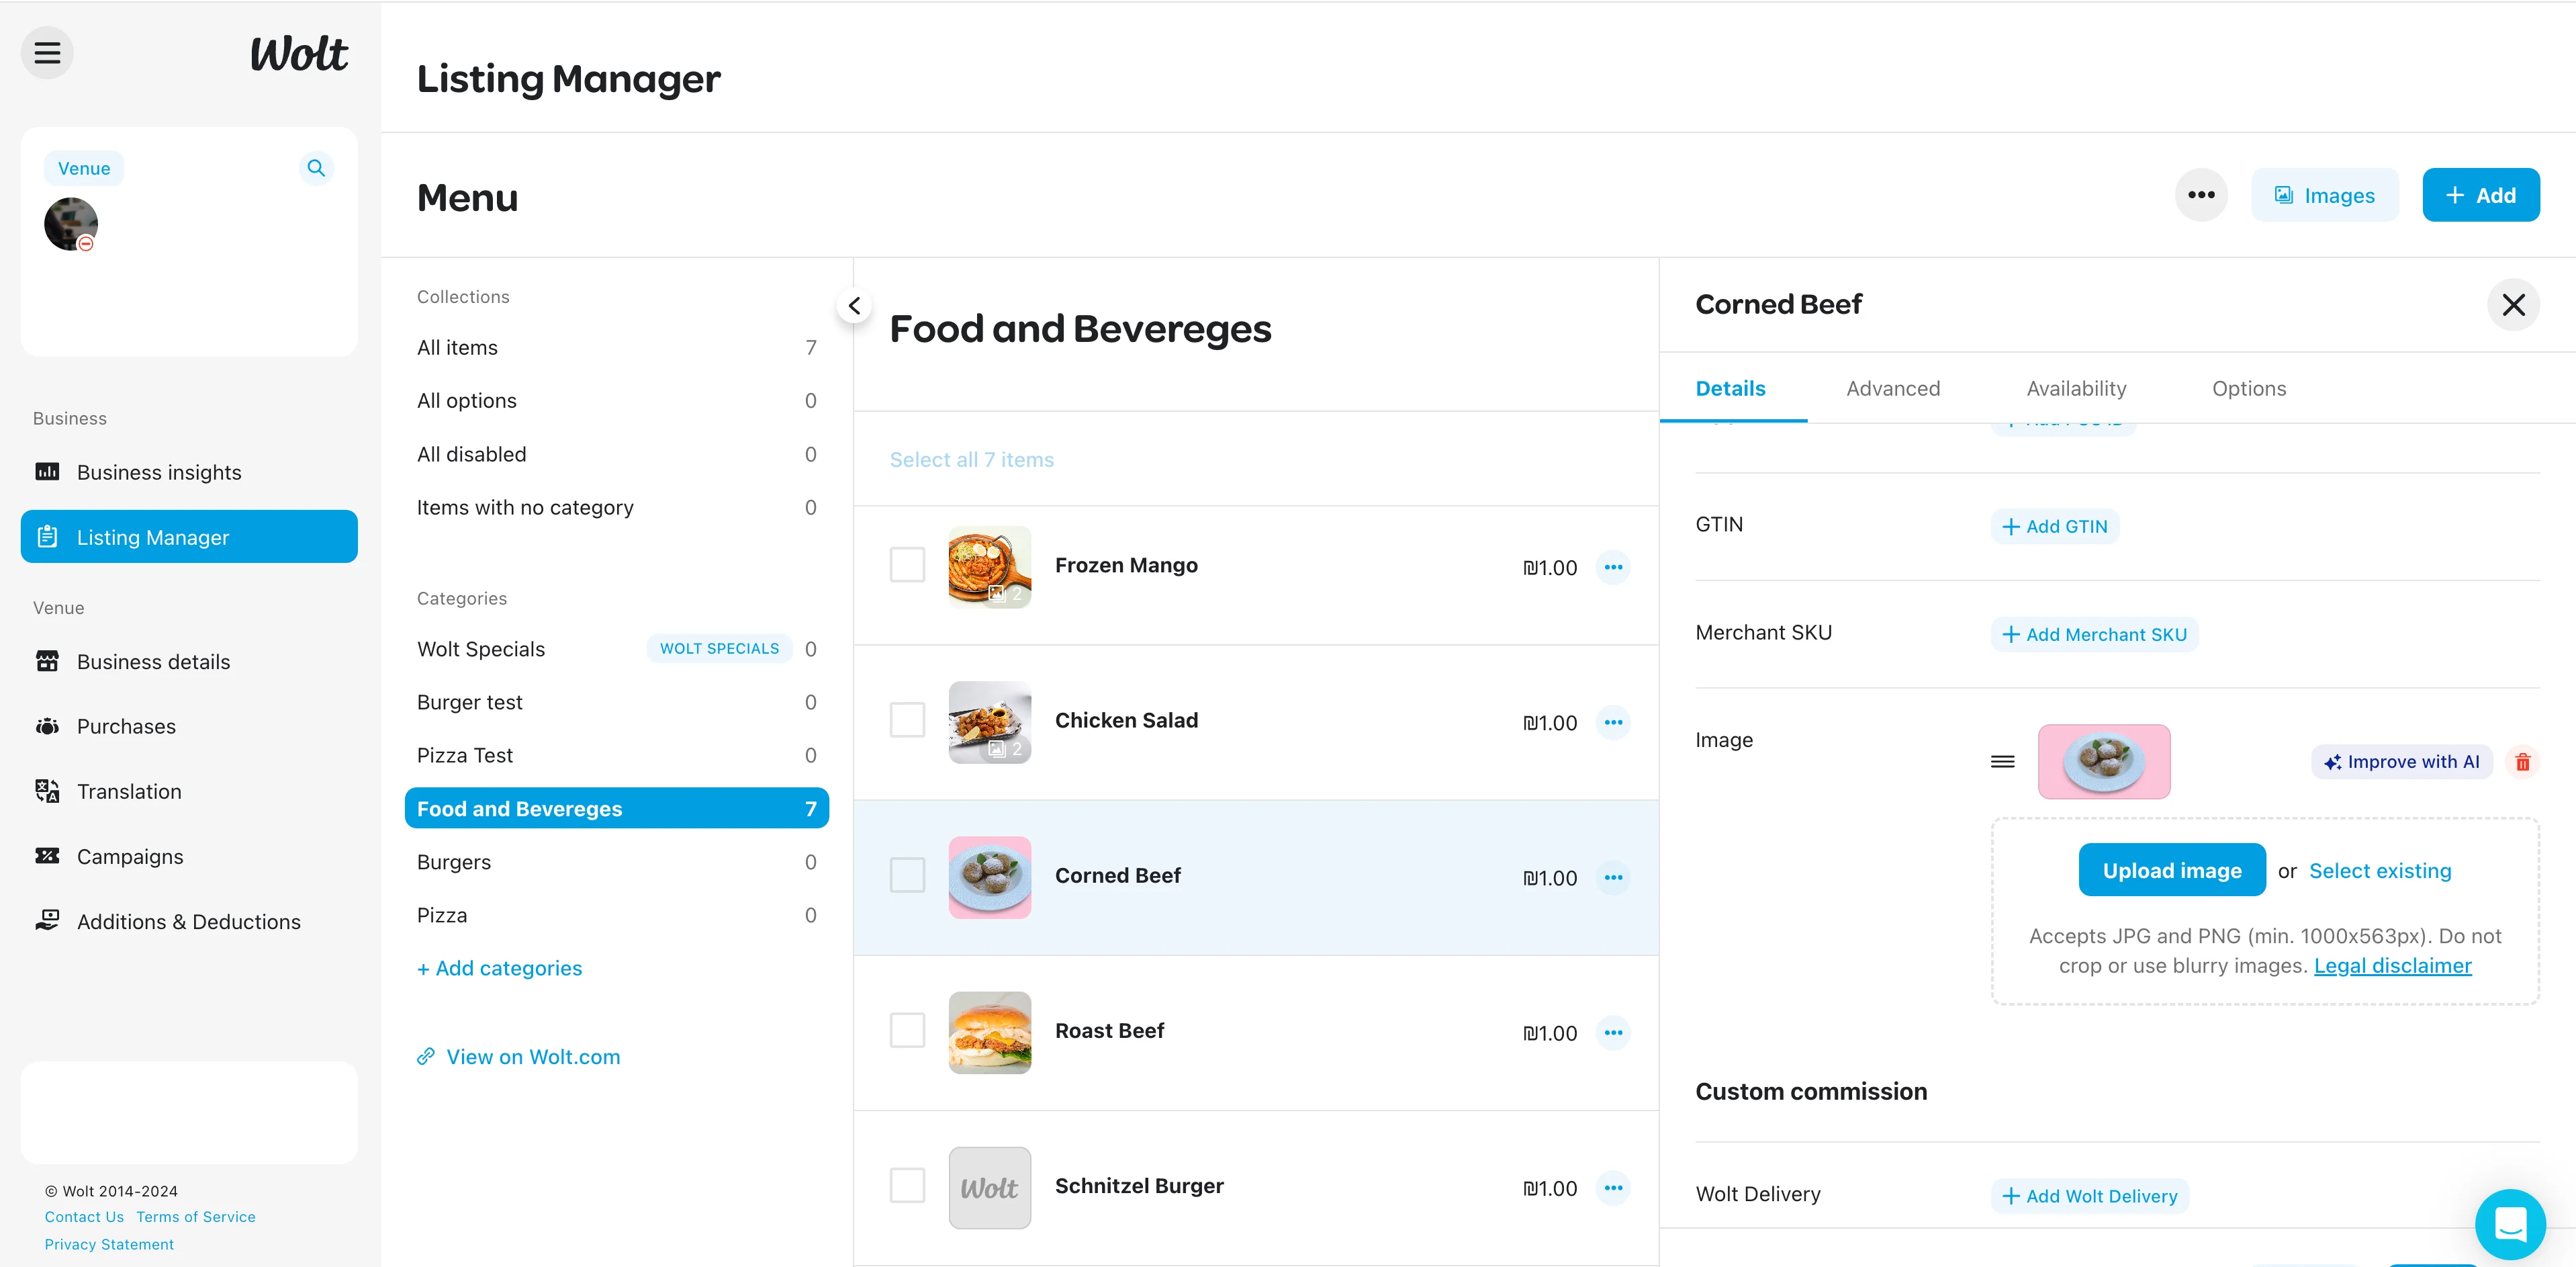
In your Merchant Portal account, select “Listing manager” in the left navigation tab.
To add a new photo, select the item you would like to add a photo to and click the “Edit” button on the top right and scroll down. Upload and save your image.
To edit the photo you just uploaded, select the item again and click the “Edit” button on the top right and scroll down. Select "Improve with AI" to edit your image.
To remove an image, click the red trash can icon. Then, click "Upload image" to choose a new one.
How to add or edit multiple (large batch) menu photos from the Merchant Portal
1. In your Merchant Portal account, select "Menu editor" in the left navigation tab.
2. Click on the “Images” button on the top right corner
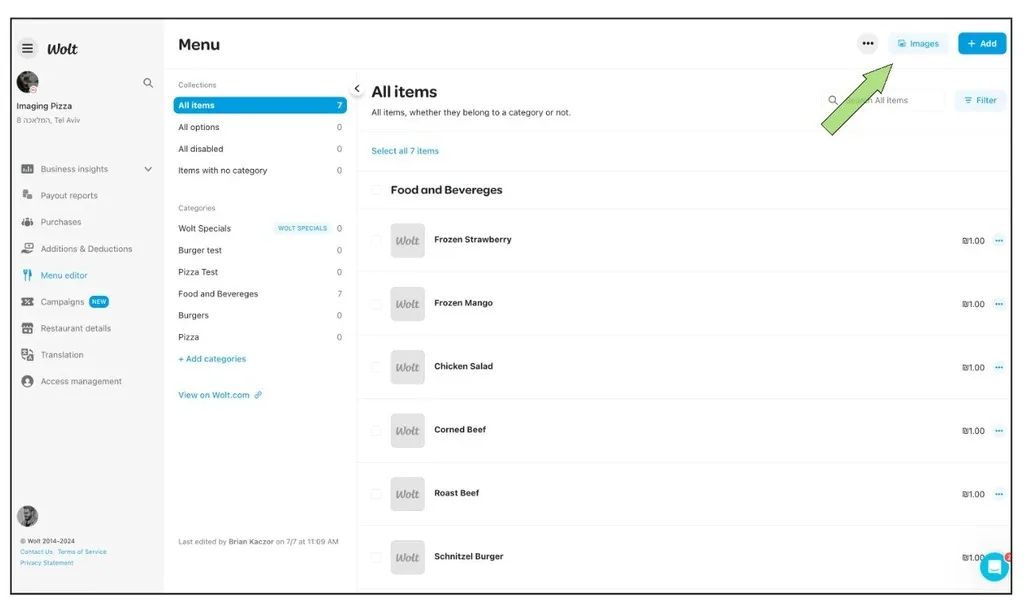
3. Upload your images by choosing your image or dropping them in the upload box
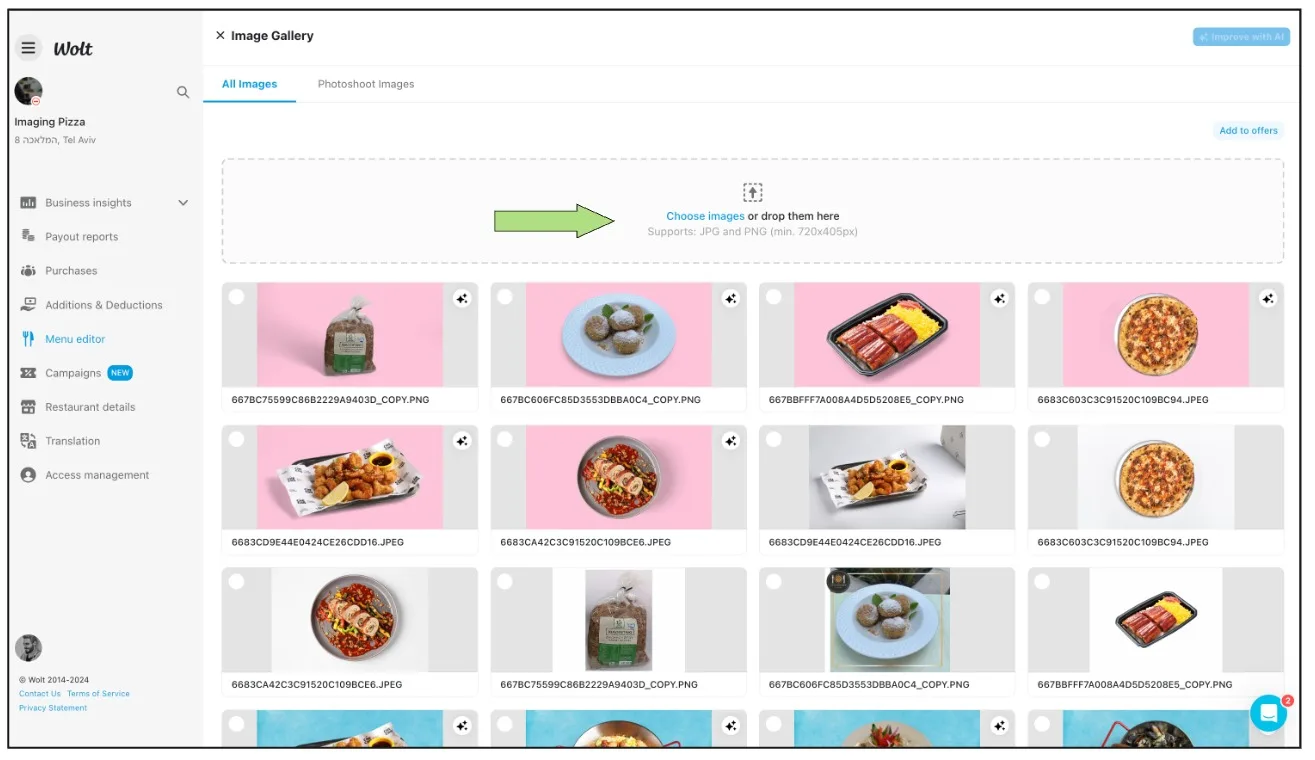
4. Edit your uploaded images:
After uploading the images, they will appear in your gallery.
Choose the images you want to edit by clicking on them. Ensure you see the blue button indicating the image is selected.
Once you’ve selected the images, click the “Improve with AI” button in the top right corner.
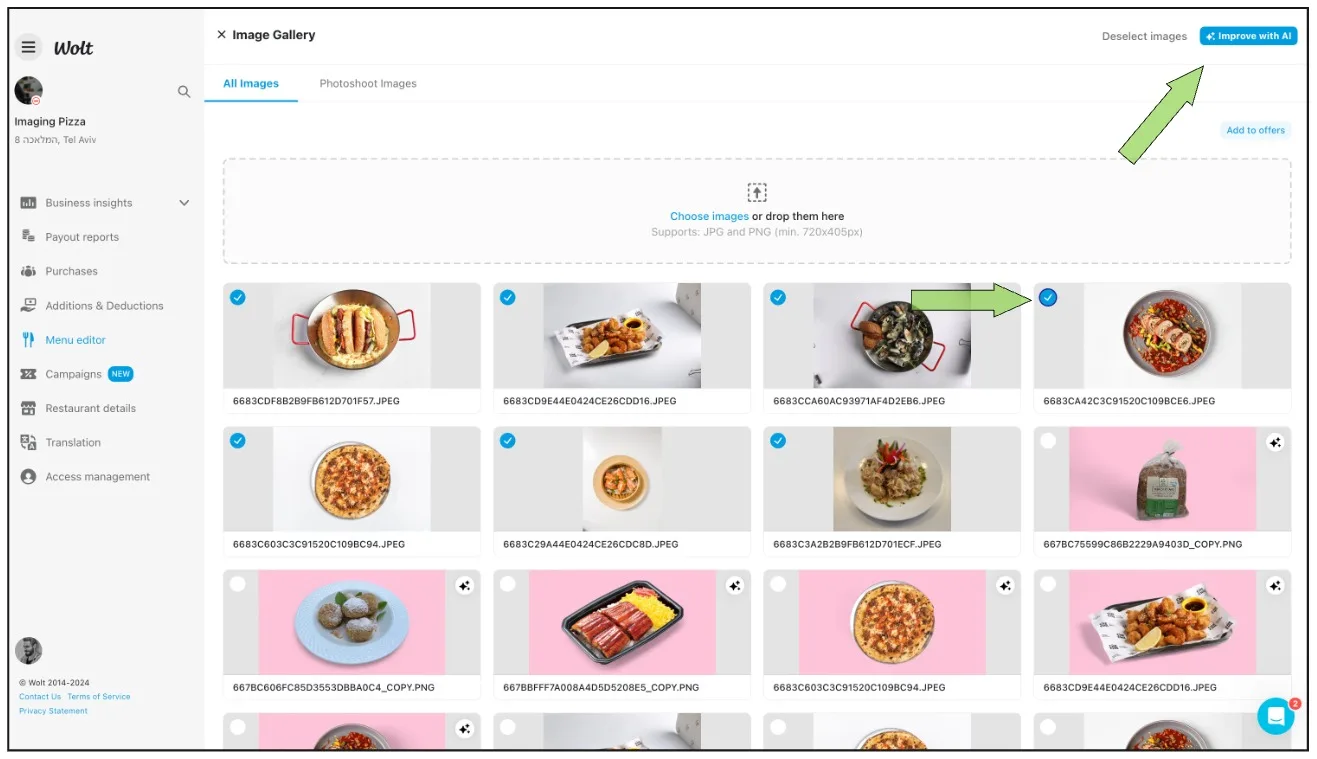
5. Choose your desired background:
Review your selected images in the right panel.
Browse the optional backgrounds in the left panel. Don’t worry if the image size is off or the image doesn’t look perfect at first.
Once you choose a background, we’ll edit it and adjust the light, shadow, size, and position.
💡 Tip: As long as the image you upload isn’t cropped or blurry, the final result should look great.
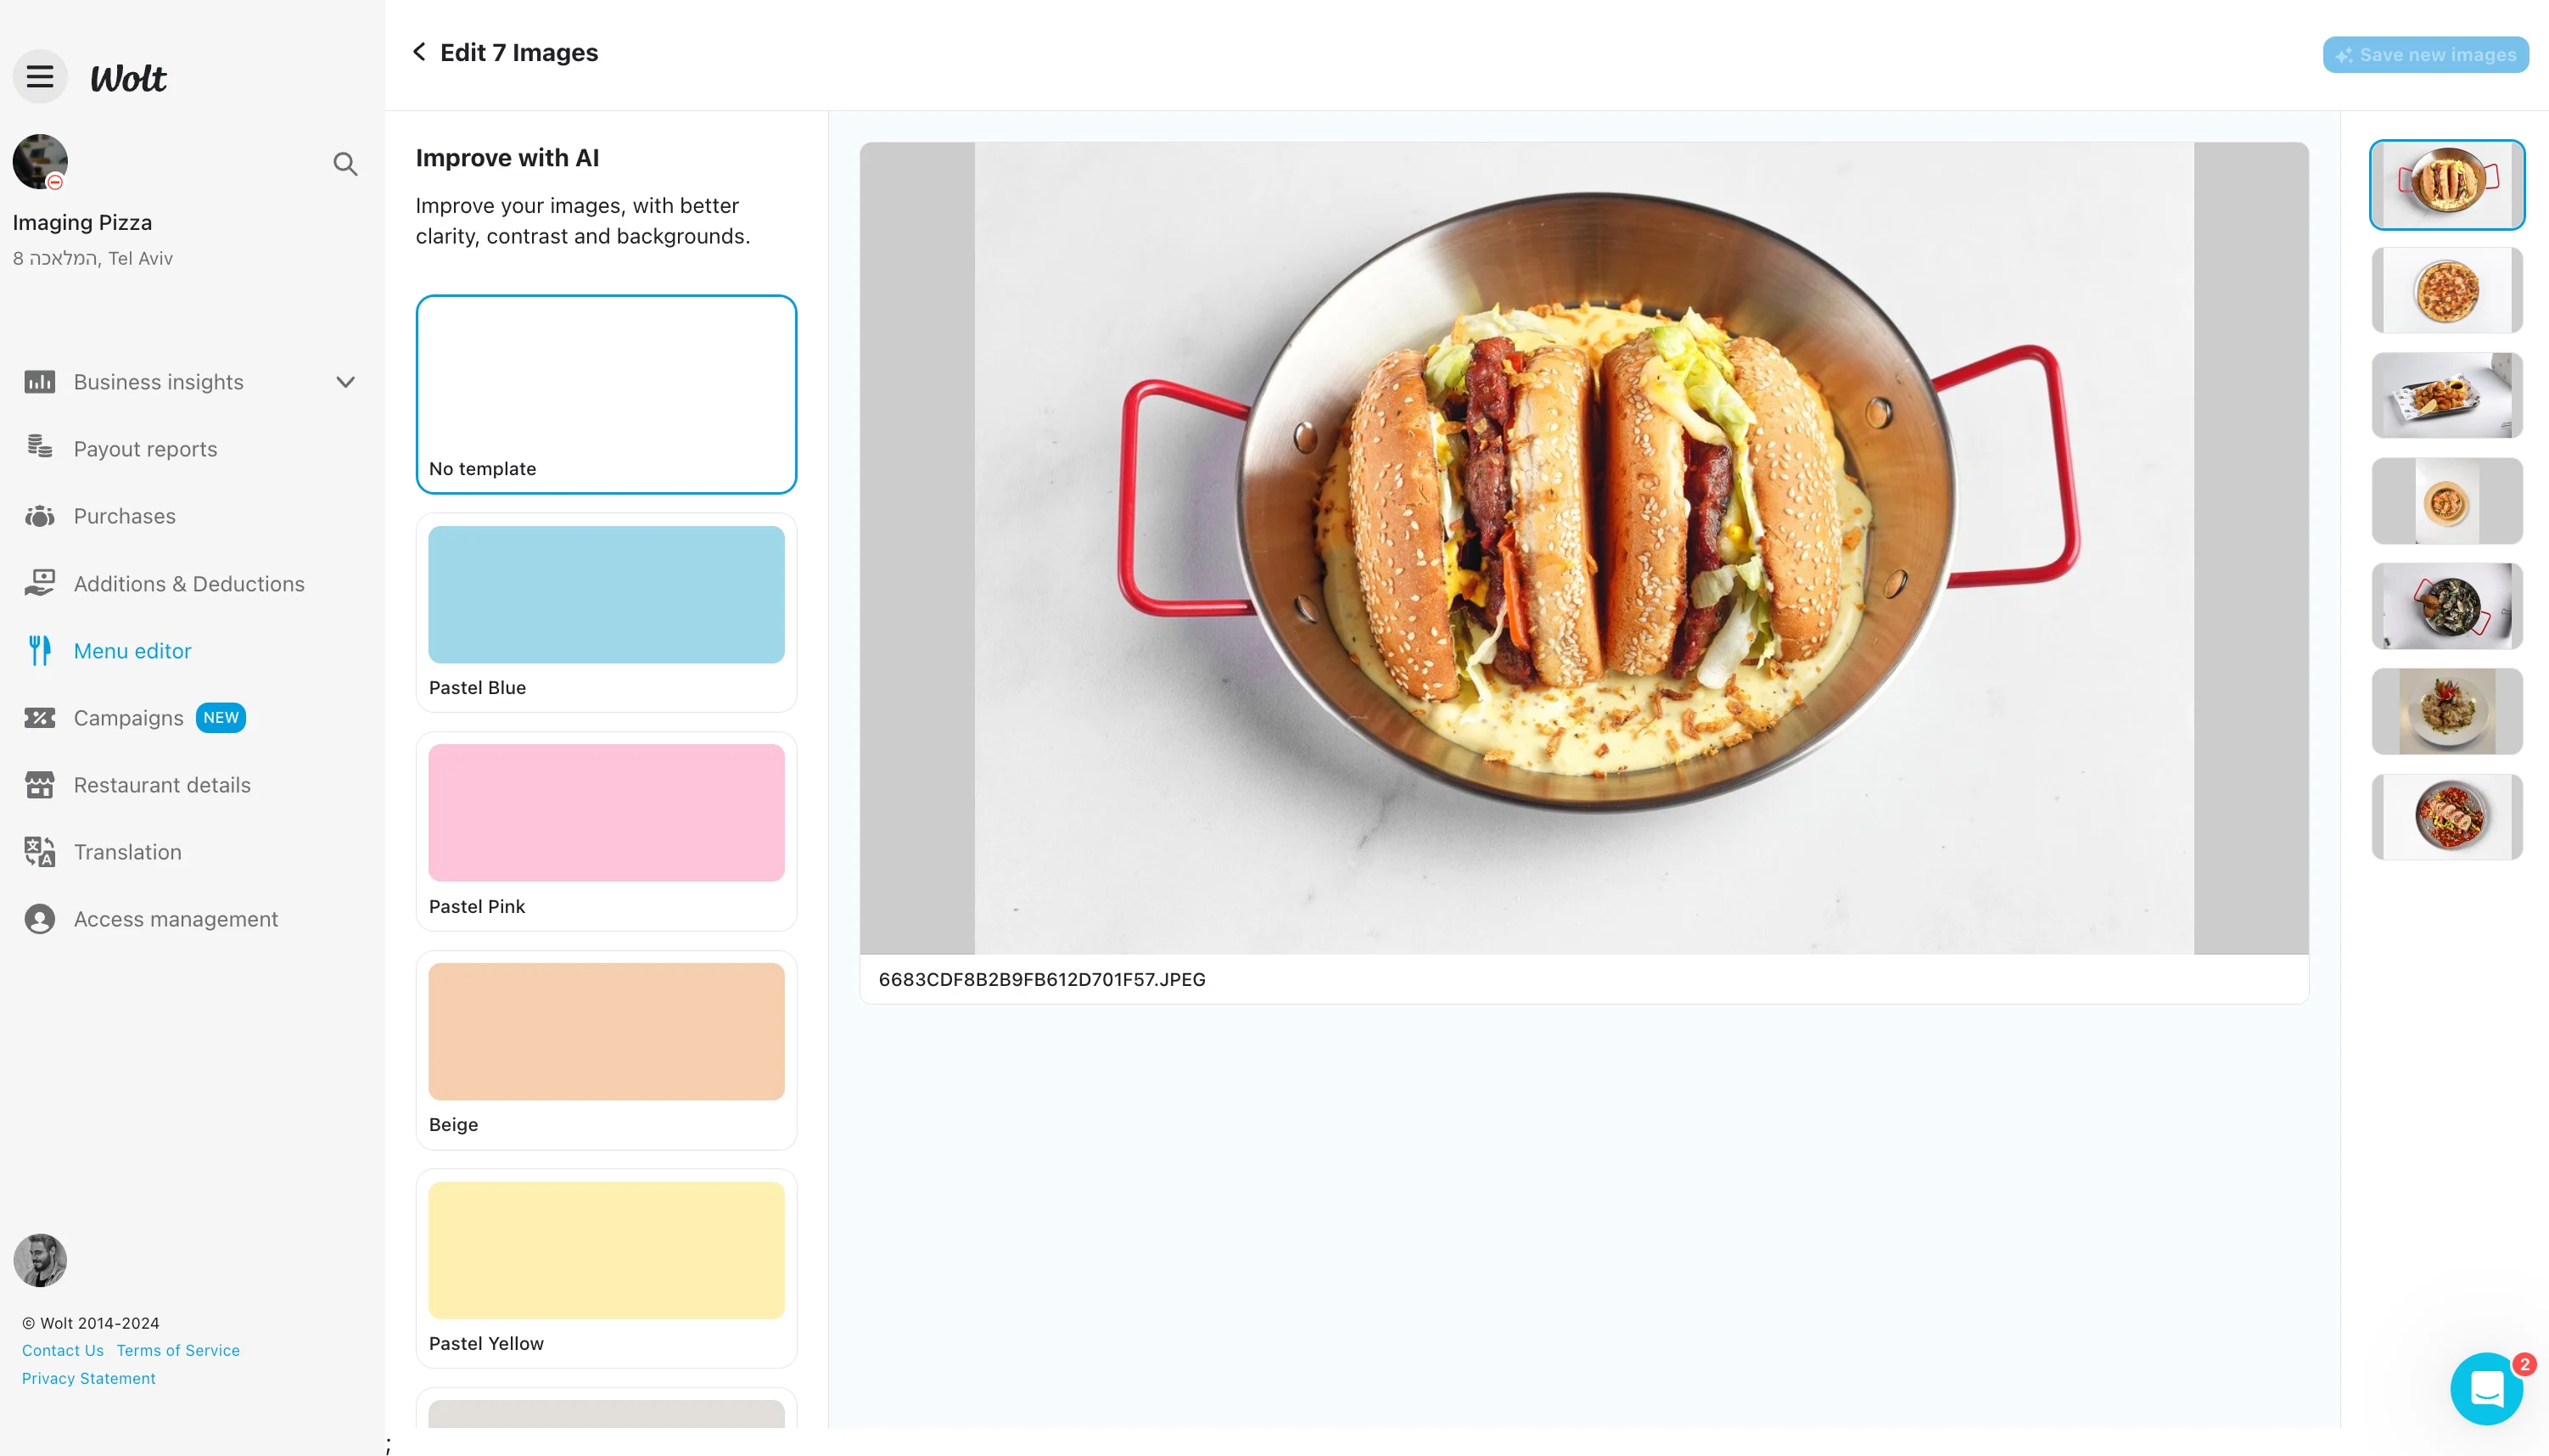
6. Save your edited images:
Choose a background from the left panel and wait for the images to be edited.
After editing, review the images in the right panel.
Click on each image to see the outcome. If you’re not happy with it, you can choose a new background.
If you’re satisfied with the edited image, click the “Save new image” button in the top right corner.
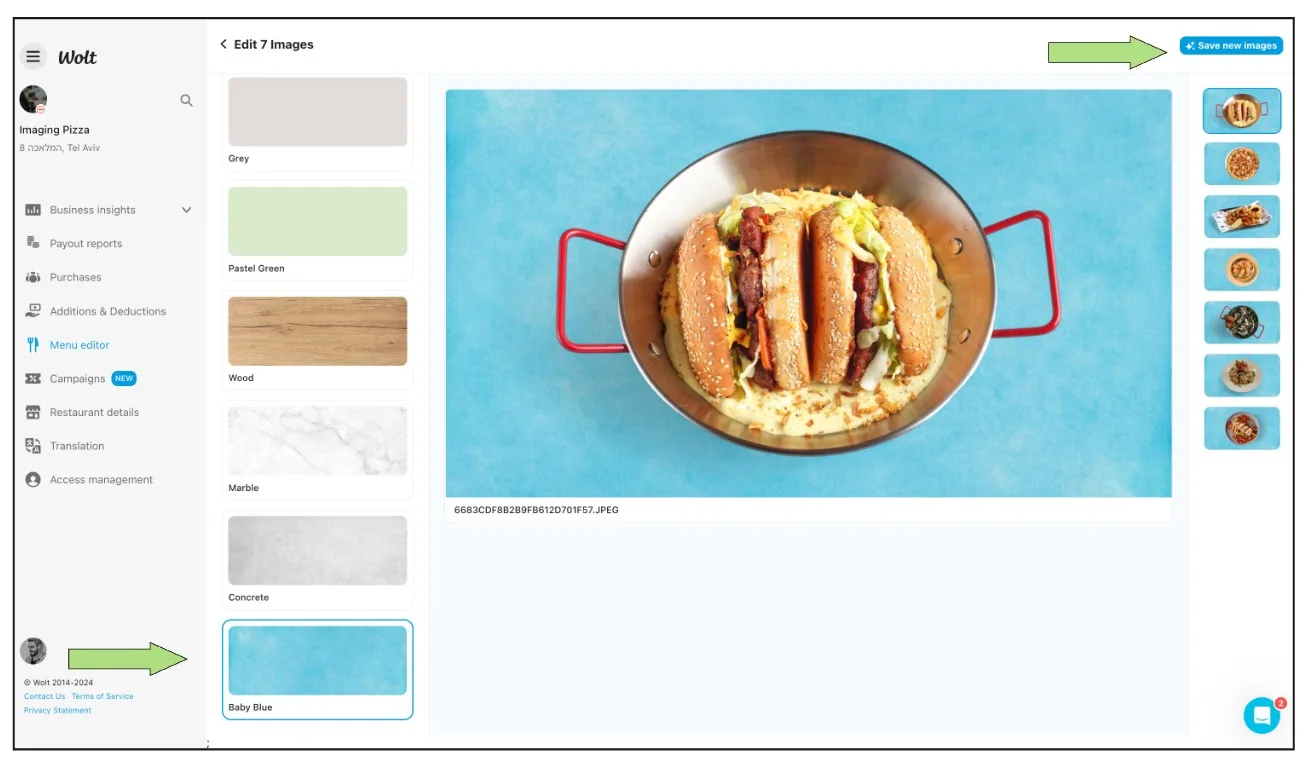
7. Attach your new images to items:
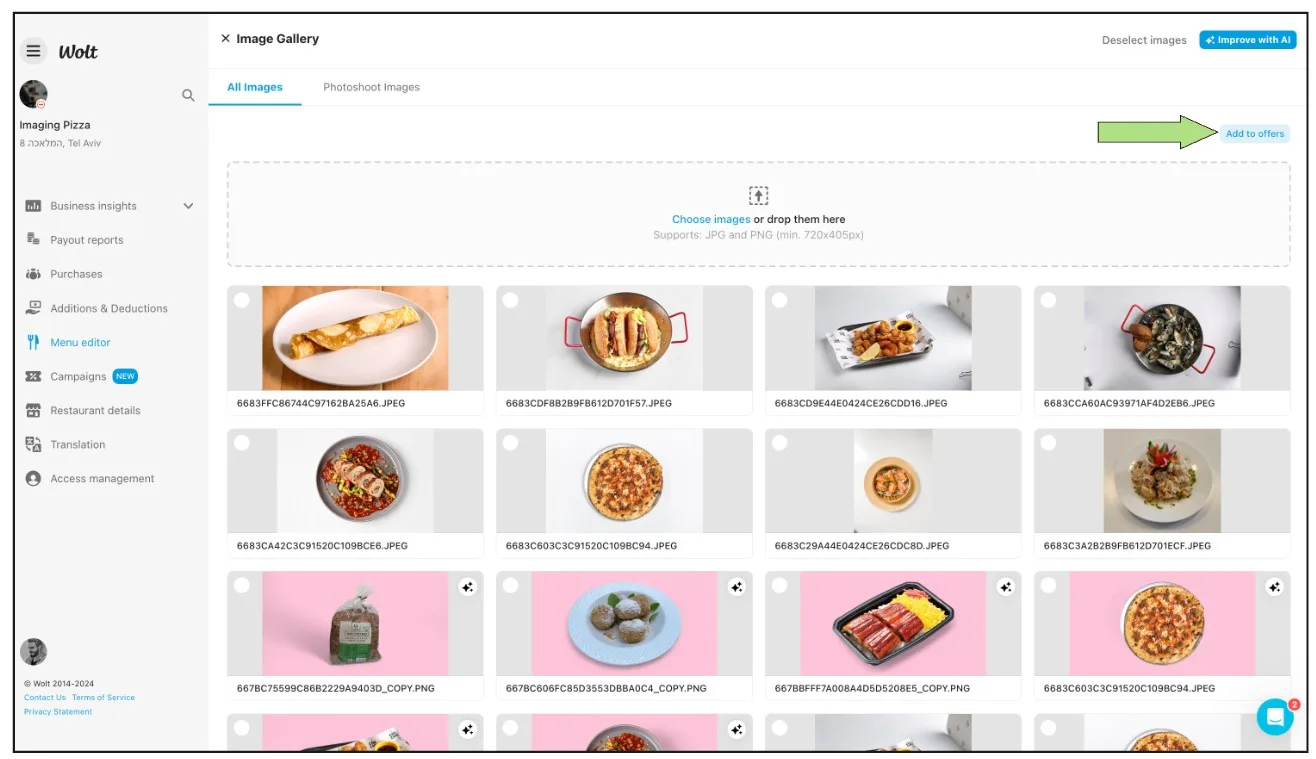
Return to the image gallery, where you can see the images you edited.
Notice that the newly edited images have a small icon indicating they were edited.
Select the images you wish to attach. Make sure the blue button appears, indicating the image is selected.
After selecting the images, scroll up to find the “Add to offers” button.
Click the “Add to offers” button to attach the images.
8. Drag and drop to attach images:
After selecting the images you want to attach and clicking the “Add to offers” button, you’ll be taken to the attaching page.
On this page, you’ll see all the images you selected in the center, and your menu offers on the left.
Drag and drop the images from the center area to the offers panel on the left. You can attach up to 5 images per item.
Please note that dragging and dropping isn’t enough—once you’ve attached all the images you want, click the “Save changes” button to finalize.
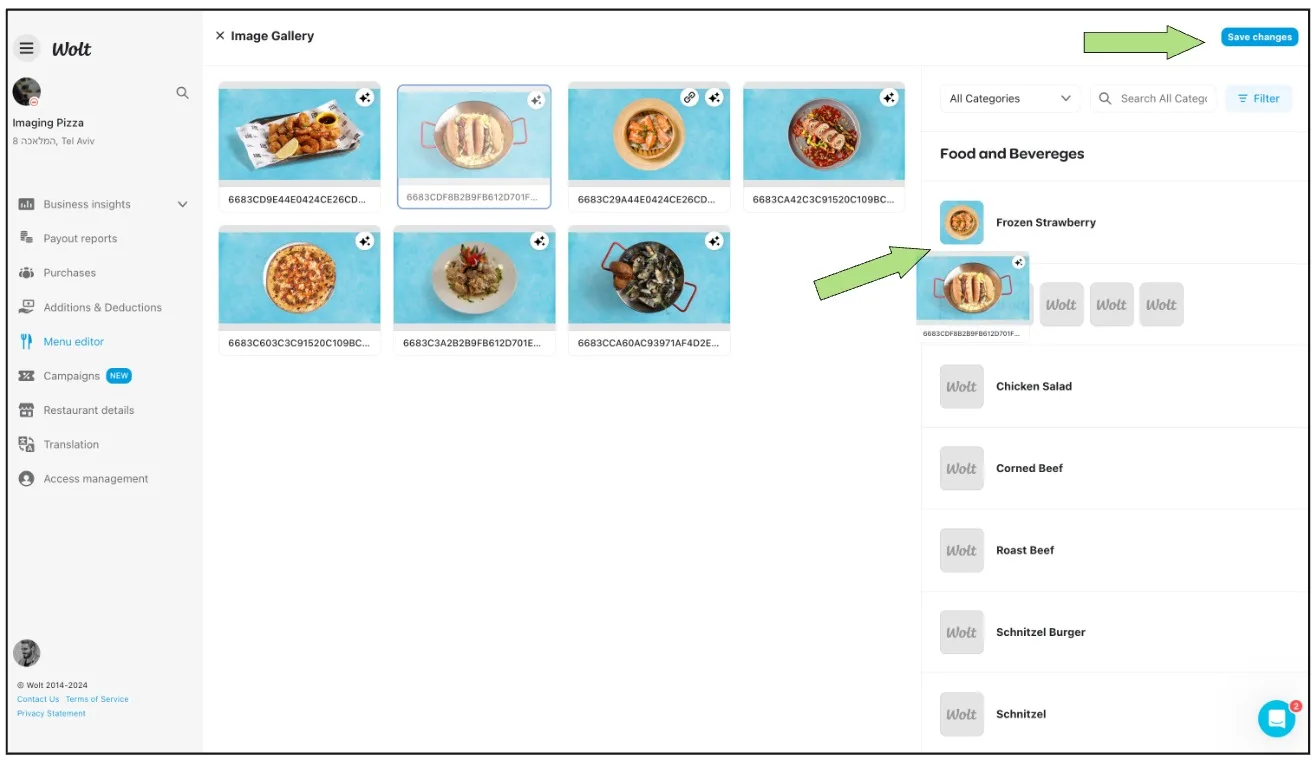
That’s it - you uploaded, edited and attached your images!
How to change a menu photo
1. Log in to your Merchant Portal account.
2. Open the Listing Manager (formerly known as the Menu Editor).
3. Find and click on the item for which you want to change the photo.
4. In the upper right corner, click the “Edit” button.
5. Scroll down to the “Image” tab.
6. Click on the “Trash” button to remove the current image.
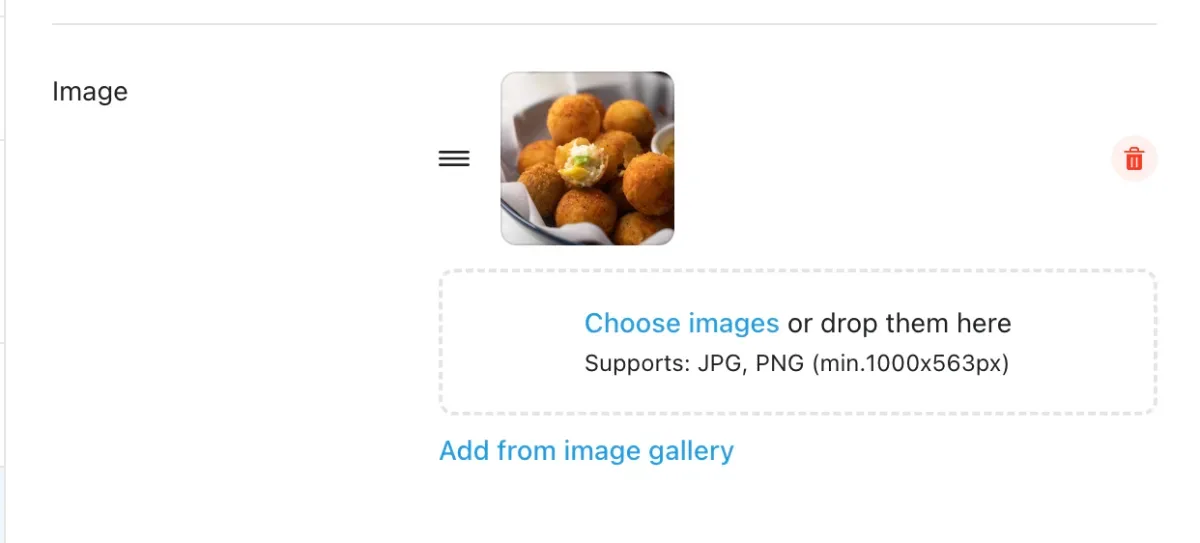
7. After removing the old image, click on the “Choose images” link.
8. Select a new image from your computer or simply drag and drop the image file into the upload box.
9. Once you’ve added the new image, review it, and then save your changes to update the item with the new photo.
How to edit a photo
1. Log in to your Merchant Portal account.
2. Click on "Listing Manager" in the left navigation tab.
3. Select the offers in the main page of the Listing Manager. After selecting the images, you’ll see a small action bar at the top of the page. Please click the “Improve with AI” button.
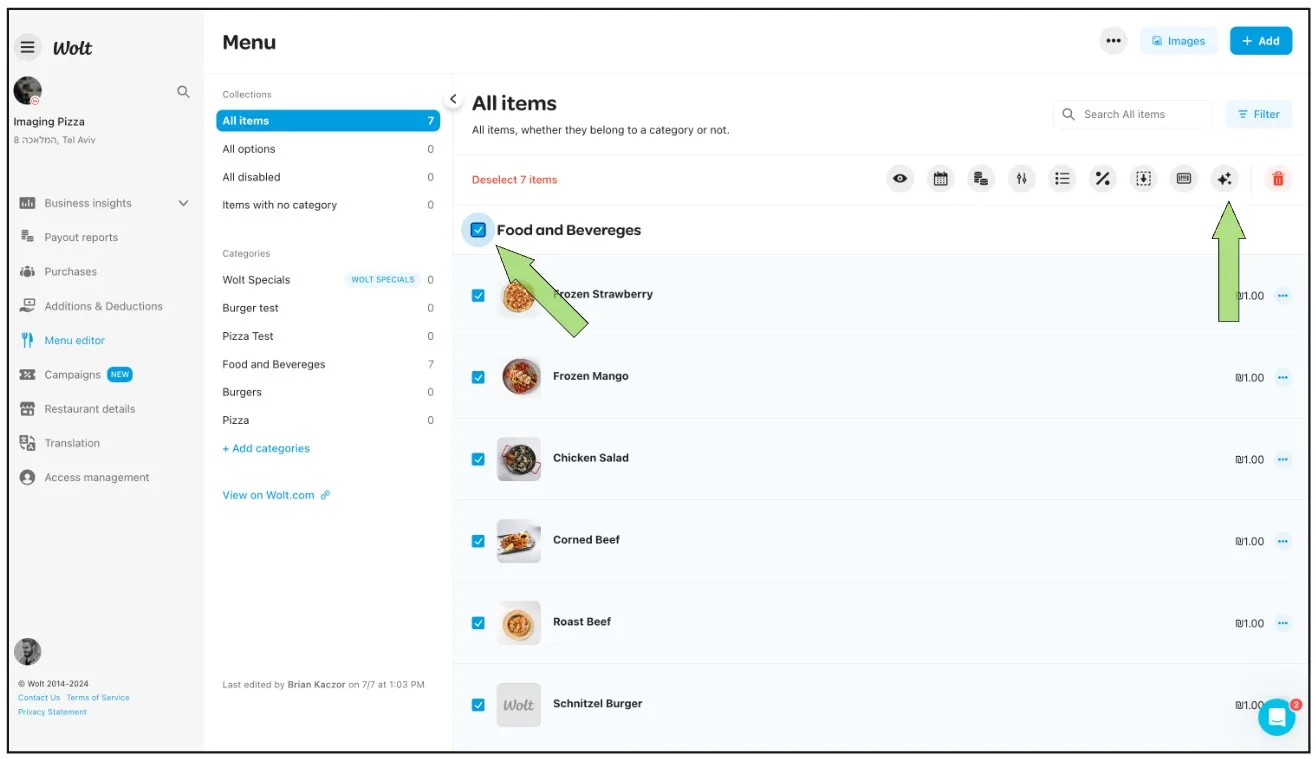
4. Choose your desired background:
On the editing page, you’ll see two panels: the right panel displays all the images you selected, and the left panel shows various background options.
Select your desired background from the options in the left panel.
5. Wait for editing:
Once you select a background, the system will automatically adjust the light, shadow, size, and position of the images. This process ensures that your images are well-edited, as long as the original image is not cropped or blurry.
6. Review the edited images:
After the editing is complete, review the images in the right panel.
Click on each image to see the results. If you’re not satisfied with the outcome, you can choose a new background and repeat the process.
7. Save the new image:
If you’re happy with the edited image, click the “Save new image” button in the top right corner. Once saved, the offers you selected will automatically update with the new images.
What is the Merchant Portal?
The Wolt Merchant Portal is an all-in-one platform. Some key actions that you can take on the Merchant Portal include:
Update venue regular and special operating hours
Temporarily pause receiving orders
Track orders
Create campaigns
Analyze sales data
💡 Tip: Bookmark the Merchant Portal for easy access!